Black Friday Sale, get my book Getting Started With Angular for half price. This offer is only until the 1st December, so click on the link below to get the offer.
Year: 2020
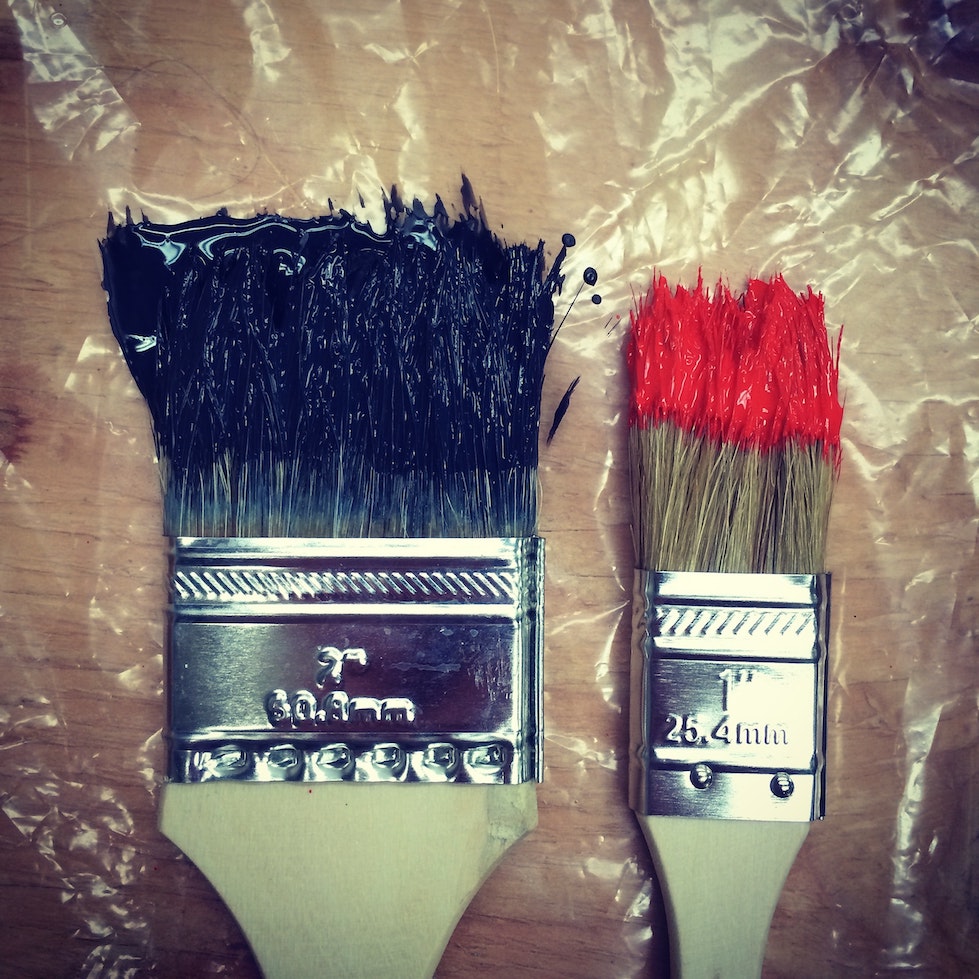
What painting a shed can teach us about writing software
What can we learn from painting
With the world being on lockdown I recently had time to finally get around to painting my garden shed. It’s a job that I kept putting off because I wanted to do other things (like playing Ghost Recon Breakpoint).
Anyway, I finally started to paint my shed and as I worked away on painting the shed, I thought to myself how we approach something like painting a shed can be job could be applied to software development.
Thinking about it there are five rules that you need to apply to paint that also applies to software development. These rules are:
- Always prep before starting
- Have the right tools
- Plan before starting work
- Don’t move on to working on a new section until you’ve finished what you started
- Practice makes perfect, well better
Always prep before starting
Before starting any project you have to prep. For painting a shed, you have to make sure the shed has been swept, removing all dust and dirt. Then you have to smooth down any splinters or rough edges and then make sure you have planned how you are going to tackle the work ahead.
Have the right tools
If you start trying to paint a shed with a small paintbrush, one that you’d use for painting a small picture. That would take you ages, and after a while, the brush would be useless through it not being the right tool for the job ahead.
The same can be said for the tools you use to build your software. In the Angular world we have tools like the Angular CLI, Karma for tests, WebStorm for writing your code. You can write an Angular application using Notepad, by why would you. Use tools that not only help you write code, but enable you to write the best code you can.
Plan before starting work
I’m not the best painter in the world so I need to spend a bit of time before throwing paint at a shed I need to make sure I’ve spent a bit of time planning what I was going to do.
So Ive learnt of the last few attempts at decorating that it I need to put in some planning before getting started. This involves working out what part of the shed I was going to paint, where I was going to start and what section of the wall I was going to paint.
Having a good plan for what I was going to do before getting started helped me do a better job this time than I had before.
This planning before you get started on a piece of work should be applied to development as well. Whenever you’re about to start a new feature or implement a new section of an application, spending a bit of time planning what you’re going to do before diving straight into the work is always recommend.
This planning , even spending a few short minutes thinking about how you’re going to tackle the problem in front of you, will save you so much time and probably lead to better written code.
Don’t move on to working on a new section until you’ve finished what you started
One thing I decided to do this time was to paint the shed section by section. This way I could keep track of where I’ve painted and move from section to section once a section had been completed.
Again this approach can be applied to development as well. When building a new application, it can be easy to start on one part of the application then quickly move on to the next, just to get the basics of the app setup. To give you the impression that you’ve got a lot of the application up and running, but this is not a great idea. Say you have a target of having 80% of unit test coverage for your app, but you’ve gone off creating screens, adding services and setting up routes. You’ve done all this work and no tests. Now you have to go back to where you started and try adding tests. But in your rush to get a lot ‘done’ you’ve written code that is hard to test!! So now what do you do, spend more time trying to work out how to write tests for code that is hard to test. All that time you think you’ve saved get all these sections done, now you have to spend more time trying to setup tests.
So it’s worth making sure that you have the section your working on completed before going on to the next feature. Yes, from a project perspective it can look like you’re getting a lot done. Your sprint tickets are being moved into In Progress and Done really quickly, but is the quality of the work you’ve done that good? Making sure you’ve finished to a decent level a section or feature of the app before moving on to the next will save time in the long run and the quality of the work you do as a developer is more impressive than moving tickets on a sprint board.
Practice makes perfect, well better
Finally, the thing I did learn while painting my shed was, while I don’t paint sheds as a living I did notice that this time I was doing a better job than the last time. Each time I had to do some decorating at home, it was a perfect opportunity to practice my painting skills and the more times I did this the better I got.
Now I admit my painting skills are not great, but that shouldn’t stop me from trying. The more times I try, the more times I could practice and through this I was getting better.
The same can be applied to web development, the first website or web application you build won’t be perfect, but only through trying over and over will you get better at writing good quality apps. It’s better to keep practicing and trying this leads you to learning new and better ways of tackling problems. Leading to better apps for your users.
A great book on this idea of practising and getting through this barrier of thinking that you’re working isn’t good enough is Steven Pressfield’s book The War of Art where he talks about the resistance we feel putting our work out there, but through getting through this resistance and keep putting work out will we get better at our work.
So while I’m not a great painter and decorator, though taking my time, working bit by bit, using the right tools for the job and not putting off getting the work done. I’ve managed to do a decent job on my shed. Taking this approach can also lead to good quality code, leading to good quality applications.
Working with legacy apps

Angular 11 has just been released, over the last few years, Angular has gone from version 2 to 11 its growth is amazing, and with each release, there are new features and new ways of working with Angular.
While this is great and shows that Angular is still a vibrant framework, it does mean that having a long term Angular app needs to be closely maintained. Version numbers need to up upgraded, test coverage needs to be maintained, there is a lot of work involved in managing legacy Angular apps.
What is a legacy app?
For me, a legacy app is one that cannot be easily maintained. Where the code base is structured in such a way that it takes a new developer on the project a few weeks to feel comfortable in being able to add new features to the app. Where the application structure doesn’t follow any industry standards and where it takes a series of steps to just get the app running locally.
With applications like this, not being able to add new features or upgrade the underlying technology that is running them means that eventually, the client will begin to resent the application that use to make their work so much easier. They become a drain on the clients time where they have to find ways around the problems the old legacy application is giving them.
How can legacy apps be improved
Not all is lost with legacy apps, there are ways to bring them back to what they were. It just takes time, effort and clear understanding with the client that things may seem to get worse for a short while but soon the application they use every day will be better.
What steps can a team take to update a legacy Angular application?
The steps that a team can take when upgrading a legacy Angular application, they are:
- Have Unit Tests – tests help by making sure any code changes have not broken other parts of the application. As the code is upgraded, or versions of packages are updated tests can be run to show these changes have not had adverse effects on other parts of the app.
- Have UI tests – these tests can be used to show how the app works for the end-user. Even if you have a legacy app that doesn’t have any end to end tests, tools like Cypress are so powerful now, it makes writing end to end tests easier. Having tests like this in place before making changes to a legacy app is a good idea so these tests can be run to check that the app still works as it did before.
- Use Angular Elements to upgrade an app in stages – if you have an AngularJS application that can’t be re-written in one large go. Angular Elements are a great way to improve parts of an application in stages. Angular Elements are complete Angular (not AngularJS) applications that can run within AngularJS application (this is a method I used to upgrade parts of a large app for a major organisation. We wrote new parts of the app as a standalone Angular app, then converted it to an Angular Element and loaded that in the original legacy AngularJS app. To the user, there was no visual difference, but to use as development team, we could use this method to upgrade the entire app, bit by bit.
- Agree to use an industry standard to how to structure any new parts of your application – if you are going to upgrade your legacy Angular application to the latest version, either through the use of Angular Elements or through a gradual re-write. Then agreeing to use an industry-standard approach to how to structure the update application is an excellent idea. For example, you decide to use an approach like adopting NgRx as the way you are going to structure your Angular app, you’ll find that the developers on your team will enjoy working with a standard approach to developing the application. There would be more resources for them to make use of when looking for the best practice approach to solving a problem. They will enjoy developing an application they know that the new skillset they are learning can be used elsewhere in the industry and an employer it will be easier to get new developers on a project up to speed to be able to work on the project if it follows a well known standard approach.
Our app sounds like a legacy Angular app, what can we do?
If your team is struggling with a legacy Angular all is not lost. You can improve it without completely scrapping it and starting again. It just takes investment by both the development team and the end-user in believing that things may be hard to work with for a bit, but through using some or all of the ideas I’ve listed above. The application can be turned around from an old legacy application that is slow and hardly has any new features. To a much faster, useful application, where new features can be added in just a few weeks instead of months. Making both the developers of the project and end users happier.
If you feel that you need an Angular expert to help you with your legacy Angular app, then feel free to contact me.
CGCSoftware News

It’s been a busy few months to the start of the year at CGCSoftware towers. First, I’ve been busy working for a major organisation helping them working on their existing Angular applications and a new NgRx based application.
Working on an existing Angular application does bring in a few challenges, finding your way around an existing codebase, learning the problems of the application, how it works and how to debug it.
These ‘legacy’ Angular applications are a facinating problem to work on for a developer. Taking on an existing application can put some people off, but I find working on them a great problem to work on. I plan to write some more about this type of work over the next few weeks.
In other news I’ve updated my book Getting Started With Angular in the 2nd edition I’ve updated the chapter on NgRx to use the new version 9 syntax.

So as you can see it’s been a busy few months for CGCSoftware, which with the current state other freelance developers are finding themselves, I’m extremely pleased to be busy. Hopefully it continues.